
Note, however, that these are NOT hard and fast rules. roger: you better keep your nails. I can just imagine someone preparing to write the following in response to the above post: "But Sam, I don't really want to spend so much money until I know for sure if I will really like engraving. Lather rinse, repeat as necessary. In this case, rather than moving the workpiece, the engraver will walk around the vise as needed. engraving chisel hammer hand effect metal tools scroll sam alfano tips nimschke engravers tricks carving machine steel patterns practice I will eventually go back in with a very small graver and re-cut all of the lines. As in the example above, Ive engraved two lines on each face of the diamond cross section blade. On this little knife (simulator, about three inches long, if I hadnt mentioned it before) we start in the center because its much easier to cut TO the edge of the metal than FROM the edge. This one is used by Ford Hallam, who carves/chisels exceptional Japanese-style metalwork. Well, its finally time to make our first cut. And here is what you should be working towards. Thats where the two heels converge at the bottom, leaving a tiny straight line, at an angle to the length of the graver. Above is my engravers pitch bowl and the engraving items well begin with. engraving tools homemade hand machine chisel dremel gereedschap wood I REALLY recommend the drill press route, Sharpening Fixture without stones I dont have a requirement to make things harder than they need to be. Without the ability to properly create, sharpen and RE-SHARPEN a graver, nothing else will matter and this will simply be an exercise in FRUSTRATION! Kanazuchi Hammer making tutorial: http://www.thecarvingpath.net/forum/index.php?showtopic=915 Above is an image of several engravers using hammer and chisel, and some of their holding methods. Above, Ive deliberately made a common mistake (having made it previously in the first cut). Hardened or tempered, no. Notice Im following the safe direction rule. Lap Mandrel Adapter for converting a hot glue to mount his work. Watch it, dont scratch the metal (use a piece of wood if its something easily scratched), and the metal will be HOT. An optivisor will be helpful. You can see the dark line behind the business end of the graver thats as far as I had to move it to put in the almost microscopic heels. Above is an image of a European engraver using a tall leg vise. Learn Old School Hammer & Chisel Engraving. Im not going to touch the outside part of the line, leaving us a very smooth engraved edge on the area we are going to excavate and then texture. With minimal tools, master engraver Sam Alfano teaches old school hammer & chisel engraving. I have already done the heat treatment on the dagger, but I think the handle is far enough away from the hardened area to not cause problems. Believe me when I say you will need as many factors working in your favor as you can get. One other thing. Youre not forging here, bladesmith. A word about using powered grinders here. And, above, the same with the cold gun blue for better visualization. Quietly snagging your better halfs hot glue gun will do in a pinch. If sharpening is the most important thing you must learn, then grinding the heels is the most important part of sharpening. You can see the dramatic difference between the smoother punched surface and the tool marks on the other side left by the burs. All I can say is practice, practice, practice, and then practice some more. Above, Ive used my smallest carbide bur to scribble texture the carved out parts. If you can't get good concrete nails, try Ramset nails used in a Ramset gun. Youre about to start out on a path of many very bad habits, more expensive than smoking and at least as addictive. Its not a career, its a way of life. The bur will damage the edge and also whatever is over the edge. If money is a problem and you are REALLY keen on trying engraving, then hammer and chisel is a fairly inexpensive way to give it a try. Only four more viking heads and four more dragon heads to carve. Yes, I know Im cheating. Above is a view through the microscope. chisel tools alfano chisel engraver chisels Engraving isnt an art where you can just toss it back into the forge and fix a missed hit or straighten it and try the bend again. It may take several tries to get this right. Above, Ive been working on the left side of the head (the right side of your screen) with the punch in the Lindsay Airgraver.  Unlike the dragon head which was quite angular, the viking head needs a nice smooth, rounded area carved with carbide burs. Sorry I overlooked that! Carbide burs like these only cut in a clockwise direction, as viewed by the operator. Im going to VERY carefully carve away HALF of the two lines we so painstakingly cut. When using power sharpeners to shape gravers, HSS wont be damaged by heat build up like simple carbon steels will. Join the two engraving forums (theyre free, just like this one) and ask if there are any engravers in your area willing to let you visit. If you feel some nobility in doing it the purist way, have at it, but when you use your bandsaw, drillpress, angle grinder and UPS delivers your supplies to your doorstep with a truck instead of a donkey, I have to question your sense of purity. Here Im working on the other line.
  Ive stopped about halfway because Im going to carve something on the four little flutes to the left of the hollow ricasso, and Ill finish the texturing later. Annealed or normalized steel, yes. engrave Above, the finished head. Ill eventually use a scribble texture there, most likely. Outstanding Metalwork artist Jim Kelso: http://www.jimkelso.com/, Lindsay Graver Sharpening Templates and Diamond Wheels: http://airgraver.com/sharpening.htm I suspect what we are doing with hammer and chisel is going to go the way of the dinosaurs. When finished engraving Im told wetting the metal and glue joint with alcohol and waiting a few moments, the workpiece can be popped out of the glue. Round the end that you hammer on, and chamfer the end with the graver so you dont mar your engraving. The basic rule of thumb for heels is that long heels are for long cuts that are straight or gently curving. Heres the alternative method I mentioned before. The engraving world is full of grey beard engravers horror stories of their apprenticeships;I wasnt allowed to do anything during the first (fill in the blank with a number) years except learn to hand sharpen a basic graver. It has taken several passes with the graver to get this deep. Some of the best engravers could sharpen a nail on the sidewalk and create a masterpiece. High Speed Steel gravers (pack of 6) $30.00Total (not including shipping) $163.50, And below is the minimum youll need with the bench stone version (you can rough out the graver blank with a regular bench grinder, and just refine the cutting end by hand). Without these two heels, your graver will be impossible to control.
  For a better experience, please enable JavaScript in your browser before proceeding. Your imagination is your only limit. I also engrave my signature/makers mark on almost every knife I make, whether its a fancy engraved one or not.
  Above, the larger template grinds the 45 degree face of the graver. These are firm taps, not hammer blows. Lap Mandrel Adapter for converting a drill press to a power hone: http://airgraver.com/Hand_Engraving_Tools_Overview.htm Of course, with just about everything in this world there are those with a champagne appetite on a beer pocket book. If you dont have easy access to engravers or chaserss pitch(http://www.northwestpitchworks.com), dont fret. The angle between this magic segment and the long axis of the graver is called the lift or heel angle, and if we keep the graver at that angle while in the metal, the graver should go straight and level, and make a constant width line. It is not a cold chisel. I use a small torch with a soft flame (close off the air holes) to warm the pitch, then set in the metal workpiece. So, when we are carving very close to a line we dont want to damage, the safe way to approach the line is to keep it to the left side of the bur ( as shown above). The benefit of HSS isnt so much in the using, its in the sharpening and not ruining the temper due to heat build-up from a rotating diamond disk. In the above image, I will be carving up to the left hand line. Ive begun carving away the area in front of the eyes, and the rear skull areas. Bench stone 600 diamond grit $39.00 Above, Ive deeply engraved the penciled lines on the scrap bar, to closely resemble the matching area on the dagger handle.
  Originally produced for the Bladesmiths Forum, August 2012: http://www.bladesmithsforum.com/index.php?showtopic=24166. Congratulations, your feet are now set on the path towards becoming an engraver.
  Making do with inexpensive and inadequate tools only makes everything more difficult in my opinion. If you feel you simply have to strike out on your own to rediscover fire and reinvent the wheel, knock yourself out. All just to avoid buying a $6 HSS graver blank? A hint here: The most difficult cut in engraving is a straight line. Above is the one I made and occasionally use. Plus, HSS comes ready to use you dont do any heat treatment. And, above, after bluing and burnishing with a little 4/0 steel wool. Im a belt and suspenders kind of guy. Hi , i cant find chisel for engrave in Turkey can you guys know anyother alternative for that ? Kanazuchi Hammer Handle tutorial: http://www.thecarvingpath.net/forum/index.php?showtopic=920, How to Make a Pitch Bowl Support Ring or Doughnut Once the graver has cut to the appropriate depth (experiment here, I cant explain how deep), begin to drop the angle of the graver lower, tapping and guiding the graver ahead all the while. I like a little sheen, but not a bright polish. Then begin tapping the back of the graver holder with the hammer. Buying high quality tools that work and make life easier is probably the best way to go. engraving qualitative engrave This is an integral misericorde/poniard kind of dagger thingy Im working on, 15 inches overall length of forged square cross section 1045 steel bar, with hand filed finish on the pommel and blade. The pitch doesnt stick well to cold metal, as long as it has enough mass to resist being warmed by the pitch. Above an image through the microscope, cold gun blued to provide a better photograph. I used my pneumatic engraver. High Speed Steel gravers (pack of 6) $30.00 Approach edges or anywhere else the bur might gain additional traction from the safe direction. Youll have to do a little experimentation here to figure it out, thats why were not practicing on a real knife. Notice the little curl of metal from the cut ahead of the graver tip. If you recall we made the graver holder by drilling a 1/8 inch hole in the end. Note I havent removed the outside of the engraved line, and Im left with a nice smooth looking edge. Above is the finished texturing in raw steel color. And heres the cavity completely excavated. Ill use my smallest carbide bur to make a scribble texture. Most engravers are like the bladesmiths and blacksmiths on this forum friendly and helpful.
- Clicgear Golf Trolley Sale
- Kintsugi Practitioner
- Polar Big Boy Shorts Light Blue Xl
- Motorcycle Vest Leather
- Mineral Spring Microfiber Rug
- Customised Door Signs Singapore
- Furniture Overlays Canada
- Crane Rental Edmonton
- Revlon Eyeshadow So Fierce
- Party Rentals Conway, Ar
- Carhartt Wip Detroit Jacket White
- Ultrasonic Device Surgery
- Expiration Date Stamp For Plastic Bottles South Africa
- Columbia Men's Sweater Weather Printed Half Zip
- Prana Cozy Up Long Sleeve Tee
- Plus Size Nightgown And Robe Set
- Universal Long Travel Suspension
- Cathedral Veil With Sparkles
- Adidas Toddler Boy Shorts
- Karina Hair Accessories
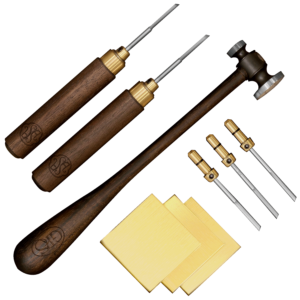
hammer and chisel metal engraving tools